Practicing on the Small Scale

Enjoy building Lego and then put it to good use for photography practice. 1/400s F1.4 105mm ISO 400 (10 photo photostack).
One of the rules professionals are supposed to live by is that you shouldn’t practice on the job but as some of you may know winging it can sometimes be unavoidable. However, whilst practice can be difficult when a lot of a resources are required there is a trick to get around this – scaling things down. Recently I did my first shoot that involved a group shot of four cars. Ordinarily even getting hold of four cars would be a challenge, let alone having people to then move them about. Thankfully, I’d had a chance to practice during lockdown with Lego cars which I had built whilst we were all stuck at home. What’s great about this is that it’s easy to do all the trial and error in moving things around without a lot of the headaches and worries over wasting other peoples’ time. This can be applied to a great many things that require the setup of several objects and I am going to run through a few areas of practice.
First off is basic perspective based on height. Many people are guilty of simply shooting things only at head height, but this can get a bit boring as it is not necessarily the most attractive angle and is the most commonly captured. Only doing this won’t make your images stand out. In the examples below I’ve also got shots taken from a high and a low angle. Replicating these is often about planning, having locations that allow you to change elevation. If you know what you want ahead of time it makes it easier to factor that in.

Shot taken from a middling perspective equivalent to eye level. 1/10s F11 27mm ISO 100.

Shot taken from a low perspective with the camera pointing right at the bottom of the car. Notice how much more dramatic the foreground looks. 1/10s F11 29.5mm ISO 100.

Shot taken from a high perspective. You can see much more of the car, extending over to the side away from the camera than compared to the shot taken at normal eye level. 1/10s F11 27mm ISO 100.
Next up we can change the perceived size of two objects based on how it is framed in the background. Take these two cars here, one is much bigger than the other and that is clearly visible when they are side-by-side.

Side-by-side the difference in size is very obvious and the composition is not very exciting. 1/15s F16 47mm ISO 500.
If we move the Porsche to the foreground and the orange Corvette to the background, then the difference in size is magnified even further. The latter now looks tiny and takes up a much smaller part of the frame. I’ve also taken two shots here to compare the effects of different focal lengths. The first at 47mm and the second at 29mm. Notice how there’s more compression in the image taken at 47mm where you can see less of the background, and it appears much closer. The front features of the Porsche are also more exaggerated in the shot taken at 29mm and it looks almost as if it is leaning into the camera. This makes the car look more imposing and intimidating, which is why car photographers often use wide angle lenses.

A more interesting composition but pushing the Corvette back makes it look tiny in the frame in comparison to the Porsche. 1/15s F16 47mm ISO 500.

Changing to a wide angle perspective gives the Porsche a more aggressive presence in the frame. 1/15s F16 29mm ISO 500.
Then if we switch the cars around and have the Corvette up front and push the Porsche back far enough, we now have the cars at roughly the same size in the frame. If you ever wondered how your cousin got the photo of them pushing up the Leaning Tower of Piza or holding the Moon, this is how they did it, through clever use of perspective. Notice as well in how I have positioned the cars – at diagonals facing in the opposite direction. If you look at a lot of photos in magazines this is often used as it adds dynamic interest and better fills the space the cars sit in.

Switching the cars around allows for the size difference to be balanced out. Note there’s still plenty of space in the background to add more cars to this shot. 1/15s F16 47mm ISO 500.
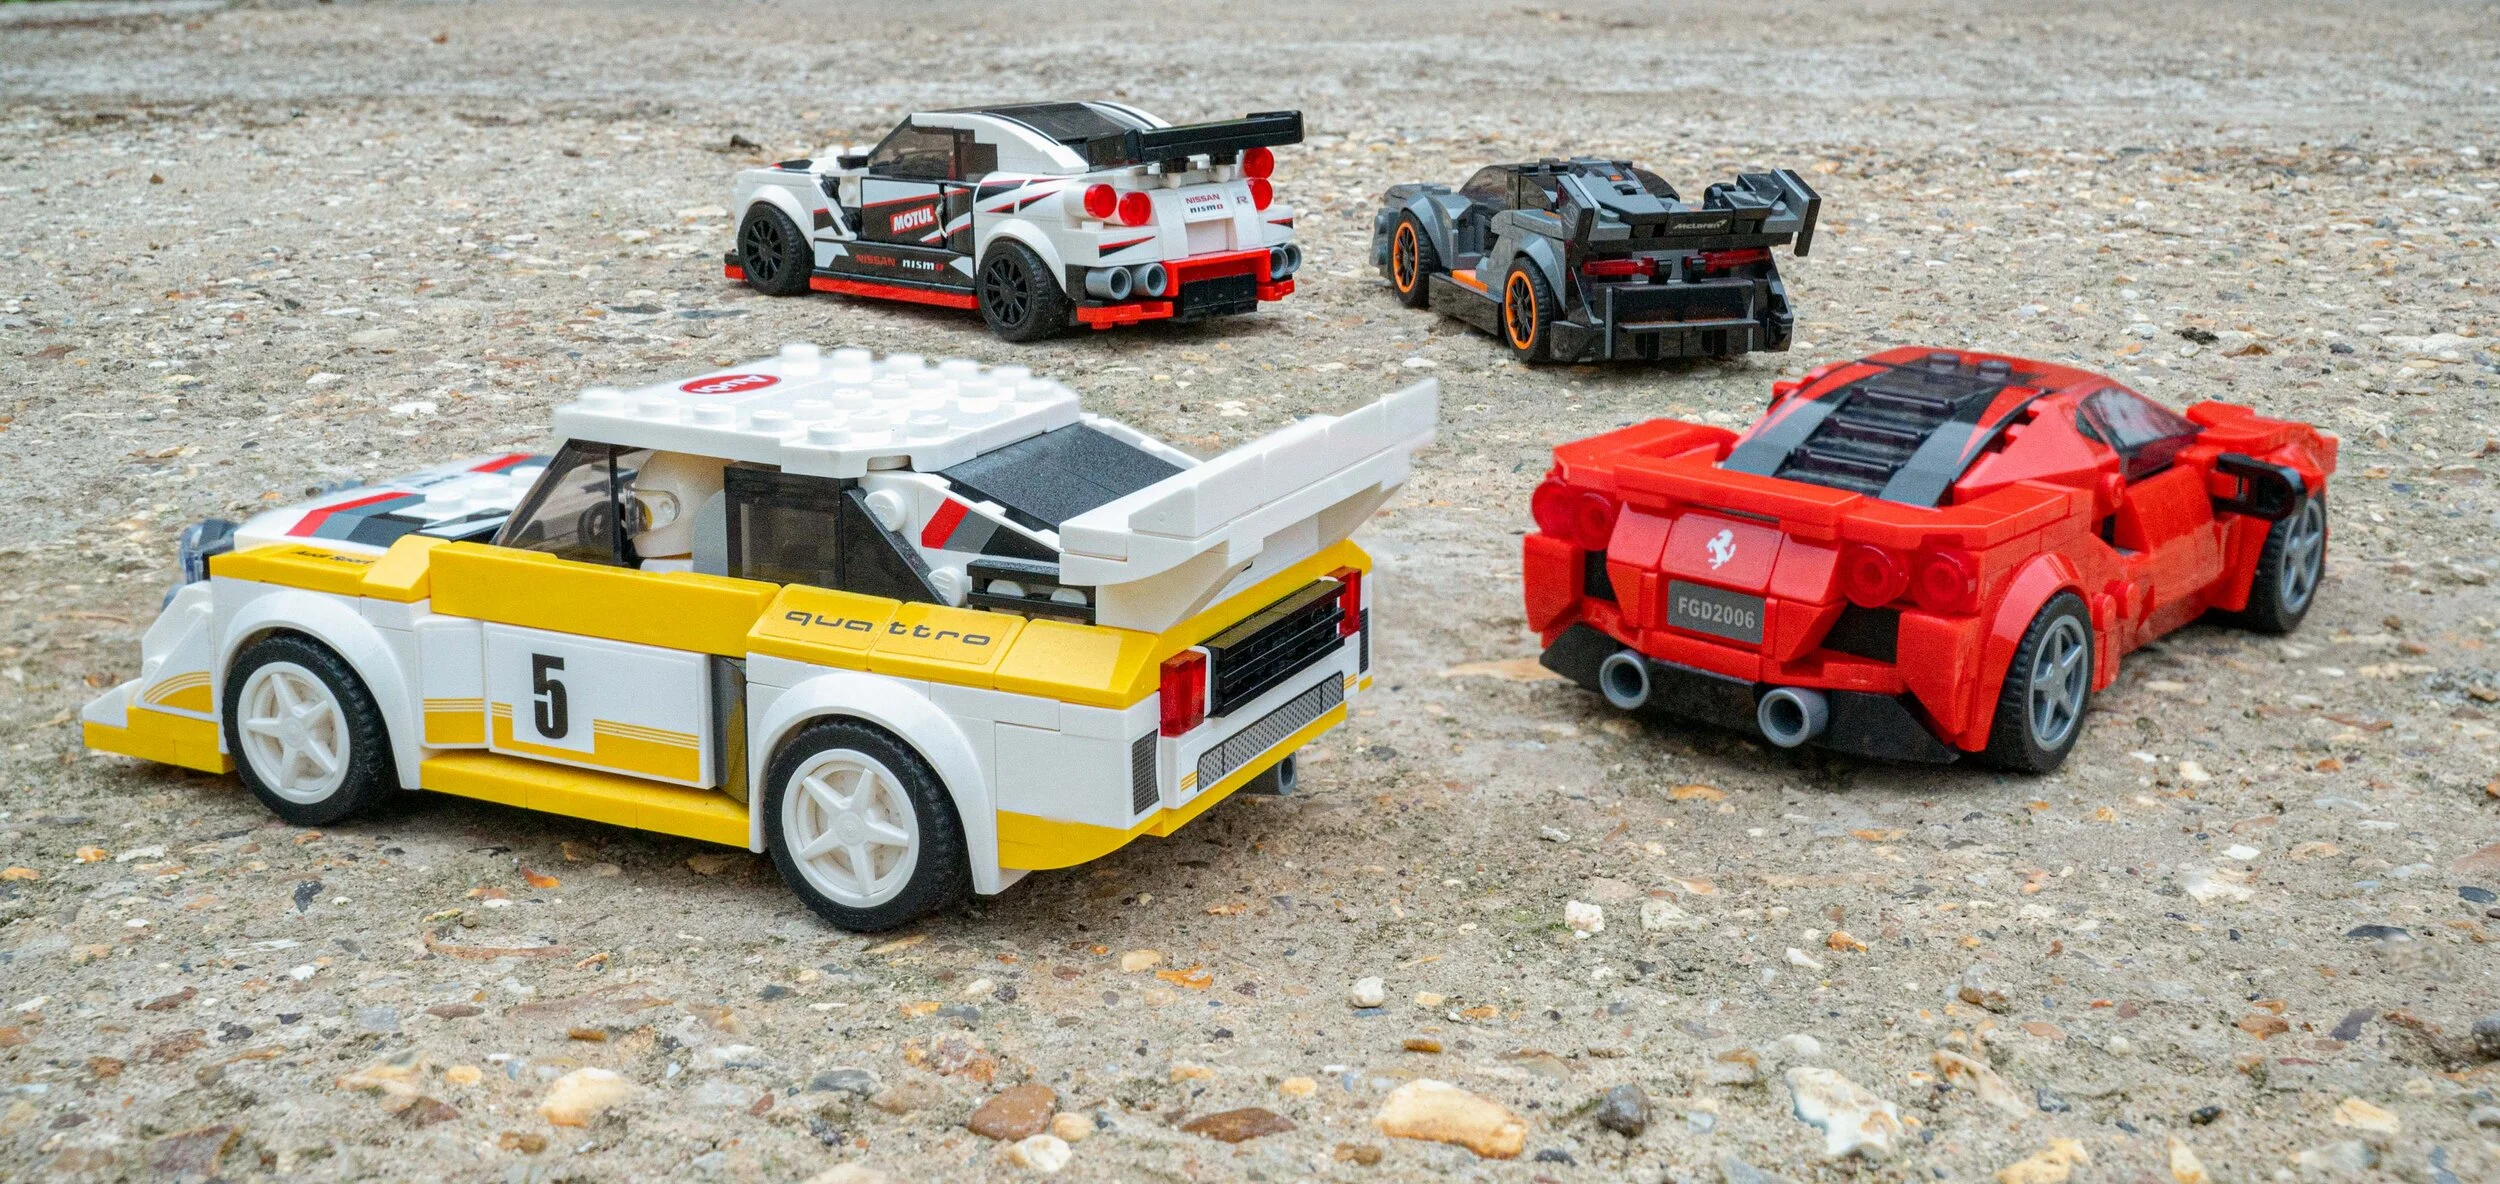
Finally, we move to shooting more than two cars, which can be difficult to get things into position. In these examples I’ve gone for the tried and tested methods of arranging the cars in two ‘Vs’. Two cars sit up front with one slightly behind the other, bonnets face inwards, and then the other two cars are arranged in a similar way within the space left behind. It’s important to try and get separation gaps between each car so that they aren’t overlapping. This way it looks a lot neater and can you fully appreciate each individual car. Of course, they don’t always have to be facing forward and you can even mix it up as you can see below. Can you also spot the deliberate mistake in the last photo? Notice how the red Ferrari is slightly further forward to be on the same level as the Audi Quattro. It doesn’t look as good as the first image as it fights for space up front and stretches the image out horizontally. Often, It’s the small but important details in composition that makes all the difference.

A group of cars arranged into a double V formation. Notice how the cars on the right hand side are slightly offset back compared to the cars on the left. 1/13s F16 39mm ISO 800.
You can of course do this for the rear of the cars as well. 1/13s F16 39mm ISO 800.

And if you are getting creative why not mix it up. Notice how the red Ferrari is not set back far enough behind the Audi and is now fighting for space. 1/13s F16 39mm ISO 800.
There are more formations that can be assembled, including adding more cars to the shot with the Porsche and Corvette. Just have a play around and use this time to come up with fresh ideas. Hopefully, I’ve demonstrated that you can still have a lot of fun with trial and error at home on the small scale before heading out to a job or into the field.
Do you have any practicing tips and tricks? Let us know in the comments down below.
If you enjoyed this blog then please consider leaving a tip below.